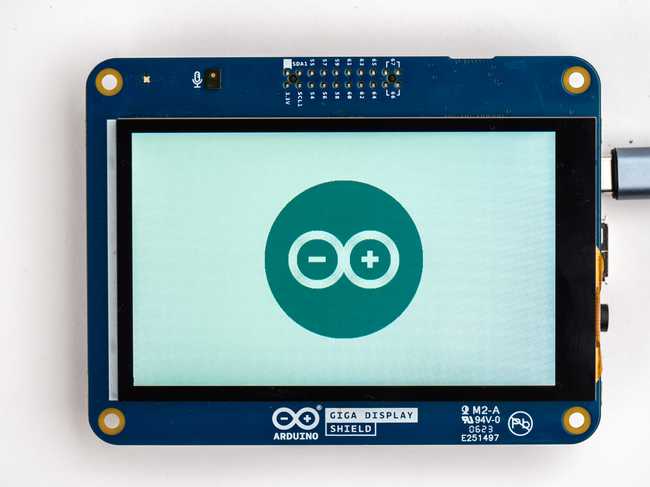
GIGA Display Shield Draw Images Guide
Learn how to use basic draw functions to create and display images on the GIGA Display Shield.
The most basic use of the GIGA Display Shield is to draw an image on the screen using code. This is made easy by using the library
ArduinoGraphicsThis is a great tutorial for getting started with your shield and exploring what possibilities the library gives us.
Hardware & Software Needed
Downloading the Library and Board Package
Make sure the latest GIGA Board Package is installed in the Arduino IDE. Tools > Board > Board Manager.... Here you need to look for the Arduino Mbed OS Giga Boards and install it, the Arduino_H7_Video library is included in the Board Package and is needed for the examples to work. Now you have to install the library needed for the graphical display features. To do this, go to Tools > Manage libraries.., search for ArduinoGraphics, and install it.
For more information about libraries and how to install them with the IDE, visit our libraries tutorial.
Using Draw Feature in a Sketch
First, we need to include the library that we will be using and define the display screen:
1#include "Arduino_H7_Video.h"2#include "ArduinoGraphics.h"3
4Arduino_H7_Video Display(800, 480, GigaDisplayShield);As we only want to draw something on the screen once, we can put all the drawing code in the
void setup()void loop()Let's first draw the background of the image. Start by initializing the display class from the library with
Display.begin()Display.beginDraw()Display.background(255, 255, 255)Display.clear()1void setup() {2 Display.begin();3 4 Display.beginDraw();5 Display.background(255, 255, 255);6 Display.clear();Next, let's draw the circle that will be the base of the logo. First, set the color of the circle with
Display.fill(0x008184);Display.circle()1Display.fill(0x008184);2 Display.circle(Display.width()/2, Display.height()/2, 300);Next, we want to draw the two circles that are in the bigger circle of the Arduino logo. First, we will set the color of the circles we are drawing. To change the color of the lines we are drawing use
Display.stroke()Display.noFill()for1Display.stroke(255, 255, 255);2 Display.noFill();3 for (int i=0; i<30; i++) {4 Display.circle((Display.width()/2)-55+5, Display.height()/2, 110-i);5 Display.circle((Display.width()/2)+55-5, Display.height()/2, 110-i);6 }Lastly, let's draw the plus and minus symbols inside the two circles of the logo. The easiest way to draw these is to use the
Display.rect()Display.fillDisplay.rect()1Display.fill(255, 255, 255);2 Display.rect((Display.width()/2)-55-16+5, (Display.height()/2)-5, 32, 10);3 Display.fill(255, 255, 255);4 Display.rect((Display.width()/2)+55-16-5, (Display.height()/2)-5, 32, 10);5 Display.fill(255, 255, 255);6 Display.rect((Display.width()/2)+55-5-5, (Display.height()/2)-16, 10, 32);Now that the drawing is done the
Display.endDraw()1Display.endDraw();2}The complete code can be found as an example in the Arduino_H7_video library, it is called ArduinoLogoDrawing. The full sketch is also below. Now upload the entire sketch and you should see the Arduino logo being drawn on the display.
Full Sketch
1#include "Arduino_H7_Video.h"2#include "ArduinoGraphics.h"3
4Arduino_H7_Video Display(800, 480, GigaDisplayShield);5//Arduino_H7_Video Display(1024, 768, USBCVideo);6
7void setup() {8 Display.begin();9 10 Display.beginDraw();11 Display.background(255, 255, 255);12 Display.clear();13 Display.fill(0x008184);14 Display.circle(Display.width()/2, Display.height()/2, 300);15 Display.stroke(255, 255, 255);16 Display.noFill();17 for (int i=0; i<30; i++) {18 Display.circle((Display.width()/2)-55+5, Display.height()/2, 110-i);19 Display.circle((Display.width()/2)+55-5, Display.height()/2, 110-i);20 }21 Display.fill(255, 255, 255);22 Display.rect((Display.width()/2)-55-16+5, (Display.height()/2)-5, 32, 10);23 Display.fill(255, 255, 255);24 Display.rect((Display.width()/2)+55-16-5, (Display.height()/2)-5, 32, 10);25 Display.fill(255, 255, 255);26 Display.rect((Display.width()/2)+55-5-5, (Display.height()/2)-16, 10, 32);27 Display.endDraw();28}29
30void loop() { }Testing It Out
Now that it is all uploaded your GIGA Display Shield should look like the image below:

Displaying Images
Now let's have a look at how we can use the ArduinoGraphics library to display images on the GIGA Display Shield.
Converting an Image
Using an online image converter you can pick any image you would like to be displayed on the display shield. However keep in mind the display is 480x800 in size. The format of the converted image needs to be Binary RGB565. Using an online image converter like the LVGL image converter tool will let you pick this as an option. Simply pick the "Binary RGB565" option under "Output format", your desired color format and hit "Convert". You will now have an image that is ready for use in an Arduino sketch.
Displaying the Image on the Display
We will be using the example sketch "ArduinoLogo" as the basis for the sketch that lets us display an image. The example sketch can be found under File > Examples > Arduino_H7_Video > ArduinoLogo.
Running the example sketch as is will display the Arduino logo on the screen, like in the image below:

Now to use the image that we converted in the last step. Use the macro inside the example sketch. This makes use of the
incbin.hAt the start of the sketch you can see these lines commented out:
1/*2#define INCBIN_PREFIX3#include "incbin.h"4INCBIN(test, "/home/user/Downloads/test.bin");5*/Uncomment these lines, and change the path to the image to the correct one. For Mac and Linux users the syntax of the path is correct as
"/home/user/Downloads/test.bin""C:\USERNAME\Downloads\test.bin"ImageBy default the image we import will be called
testImage img_arduinologo(ENCODING_RGB16, (uint8_t *) texture_raw, 300, 300);texture_rawtestDataImage img_arduinologo(ENCODING_RGB16, (uint8_t *) testData, 300, 300);Full Sketch
To run this sketch you will need to have the image file that is used in the code in the correct location. In the example from the library, the image is in the same folder as the sketch, as shown in the image below. Please make sure the image you want to use matches the location indicated in the code.

1/*2 ArduinoLogo3
4 created 17 Apr 20235 by Leonardo Cavagnis6*/7
8#include "Arduino_H7_Video.h"9#include "ArduinoGraphics.h"10
11#include "img_arduinologo.h"12// Alternatively, any raw RGB565 image can be included on demand using this macro13// Online image converter: https://lvgl.io/tools/imageconverter (Output format: Binary RGB565)14/*15#define INCBIN_PREFIX16#include "incbin.h"17INCBIN(test, "/home/user/Downloads/test.bin");18*/19
20Arduino_H7_Video Display(800, 480, GigaDisplayShield);21//Arduino_H7_Video Display(1024, 768, USBCVideo);22
23Image img_arduinologo(ENCODING_RGB16, (uint8_t *) texture_raw, 300, 300);24
25void setup() {26 Display.begin();27
28 Display.beginDraw();29 Display.image(img_arduinologo, (Display.width() - img_arduinologo.width())/2, (Display.height() - img_arduinologo.height())/2);30 Display.endDraw();31}32
33void loop() { }Conclusion
In this tutorial, we used basic drawing functions with the GIGA Display Shield. Using the
ArduinoGraphicsSuggest changes
The content on docs.arduino.cc is facilitated through a public GitHub repository. If you see anything wrong, you can edit this page here.
License
The Arduino documentation is licensed under the Creative Commons Attribution-Share Alike 4.0 license.