EsploraAccelerometer
Read orientation values from the accelerometer on the Esplora.
Esplora Accelerometer
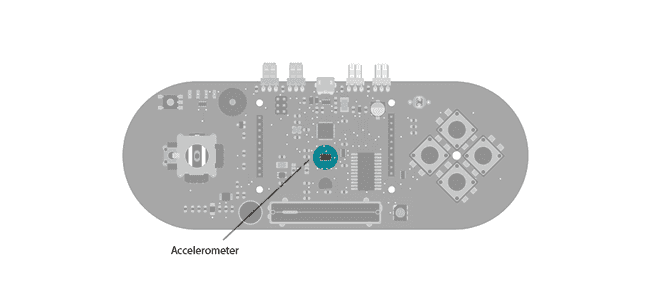
This sketch shows you how to read the values from the accelerometer. To see it in action, open the Arduino serial monitor on your computer and tilt the board. You'll see the accelerometer values for each axis change as you tilt the board.
Hardware Required
- Arduino Esplora
Circuit
Only your Arduino Esplora is needed for this example. Connect the Esplora to your computer with a USB cable and open the Arduino's Serial Monitor.

Code
To send data to your computer, you need to open a serial connection. use Serial.begin() to open a serial port at 9600 baud on the Esplora.
The Esplora.readAccelerometer() function gets the values from the accelerometer. It needs an argument telling it what axis you're reading from: X_AXIS, Y_AXIS, or Z_AXIS. Each axis will give you a value between 0 and 1023.
To send the values to the Serial Monitor, you call Serial.print(). When the Esplora is connected, and the Serial Monitor is open, you should start to see values reported like this twice a second :
1x: 6 y: -128 z: 272x: 2 y: -138 z: 193x: 9 y: -137 z: 201/*2
3 Esplora Accelerometer4
5 This sketch shows you how to read the values from the accelerometer.6
7 To see it in action, open the serial monitor and tilt the board. You'll see8
9 the accelerometer values for each axis change when you tilt the board10
11 on that axis.12
13 Created on 22 Dec 201214
15 by Tom Igoe16
17 This example is in the public domain.18
19 */20
21#include <Esplora.h>22
23void setup() {24
25 Serial.begin(9600); // initialize serial communications with your computer26}27
28void loop() {29
30 int xAxis = Esplora.readAccelerometer(X_AXIS); // read the X axis31
32 int yAxis = Esplora.readAccelerometer(Y_AXIS); // read the Y axis33
34 int zAxis = Esplora.readAccelerometer(Z_AXIS); // read the Z axis35
36 Serial.print("x: "); // print the label for X37
38 Serial.print(xAxis); // print the value for the X axis39
40 Serial.print("\ty: "); // print a tab character, then the label for Y41
42 Serial.print(yAxis); // print the value for the Y axis43
44 Serial.print("\tz: "); // print a tab character, then the label for Z45
46 Serial.println(zAxis); // print the value for the Z axis47
48 delay(500); // wait half a second (500 milliseconds)49}Suggest changes
The content on docs.arduino.cc is facilitated through a public GitHub repository. If you see anything wrong, you can edit this page here.
License
The Arduino documentation is licensed under the Creative Commons Attribution-Share Alike 4.0 license.